 Skip to content
July 26, 2018
posted in: Tutorials
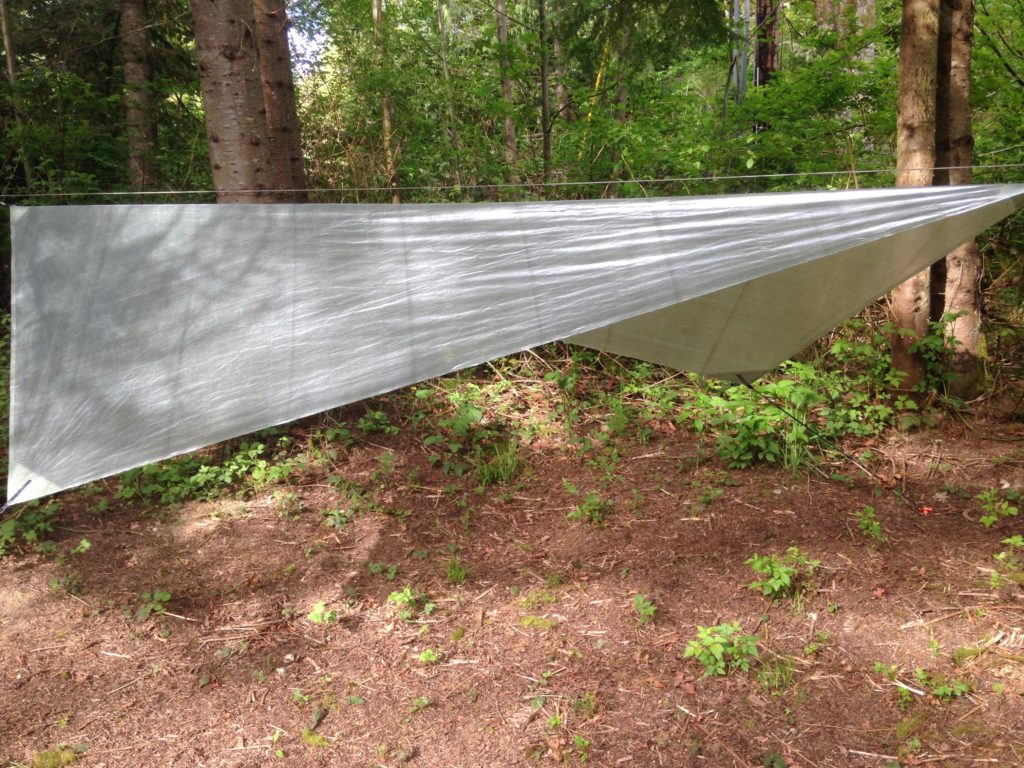
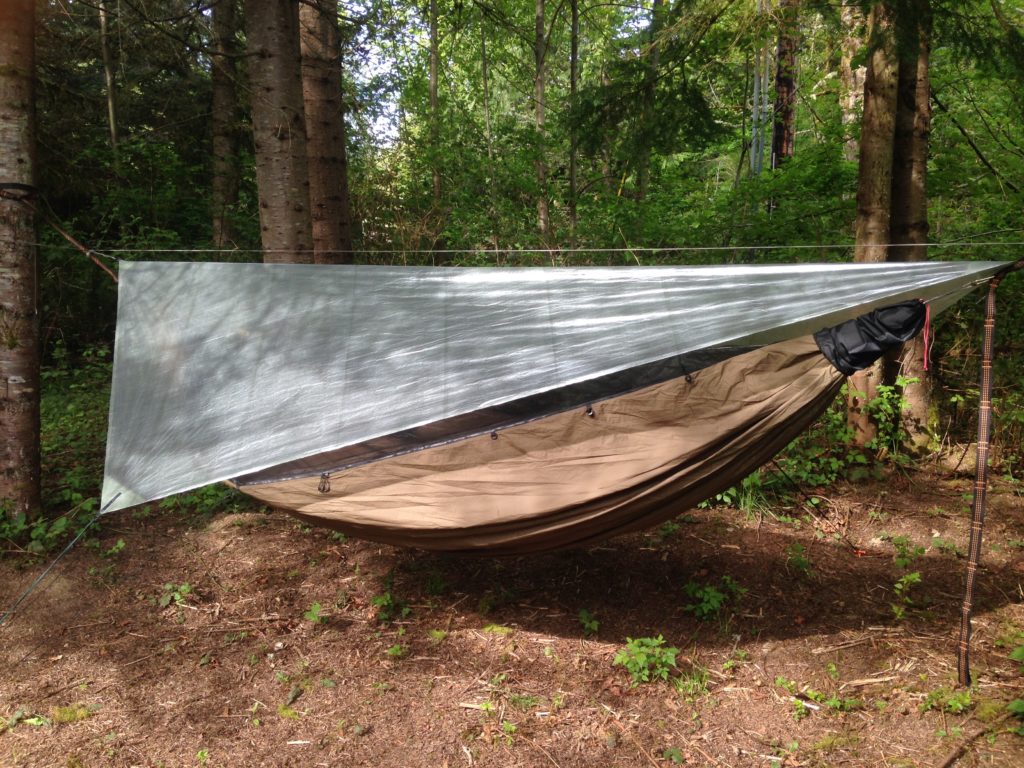
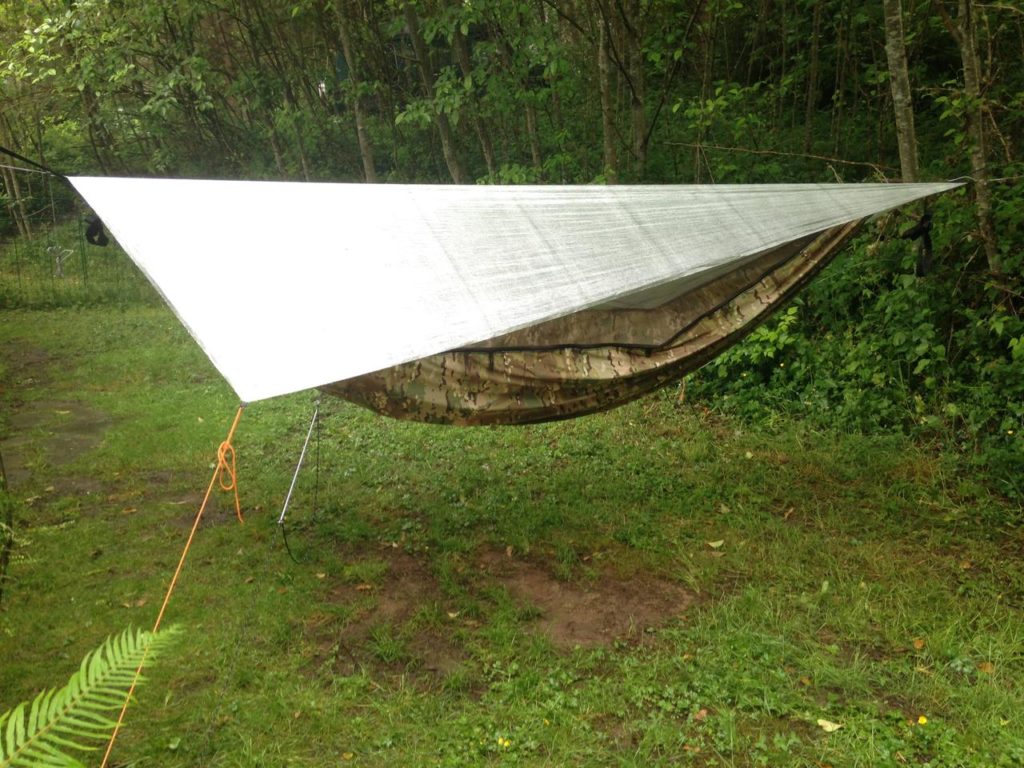
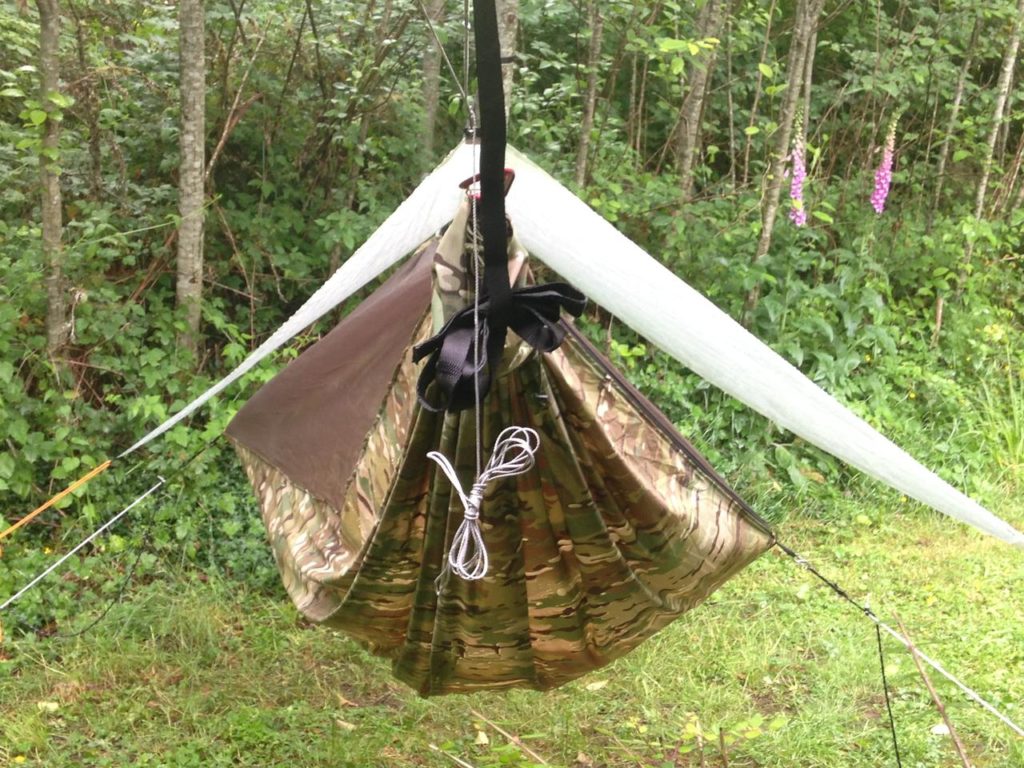
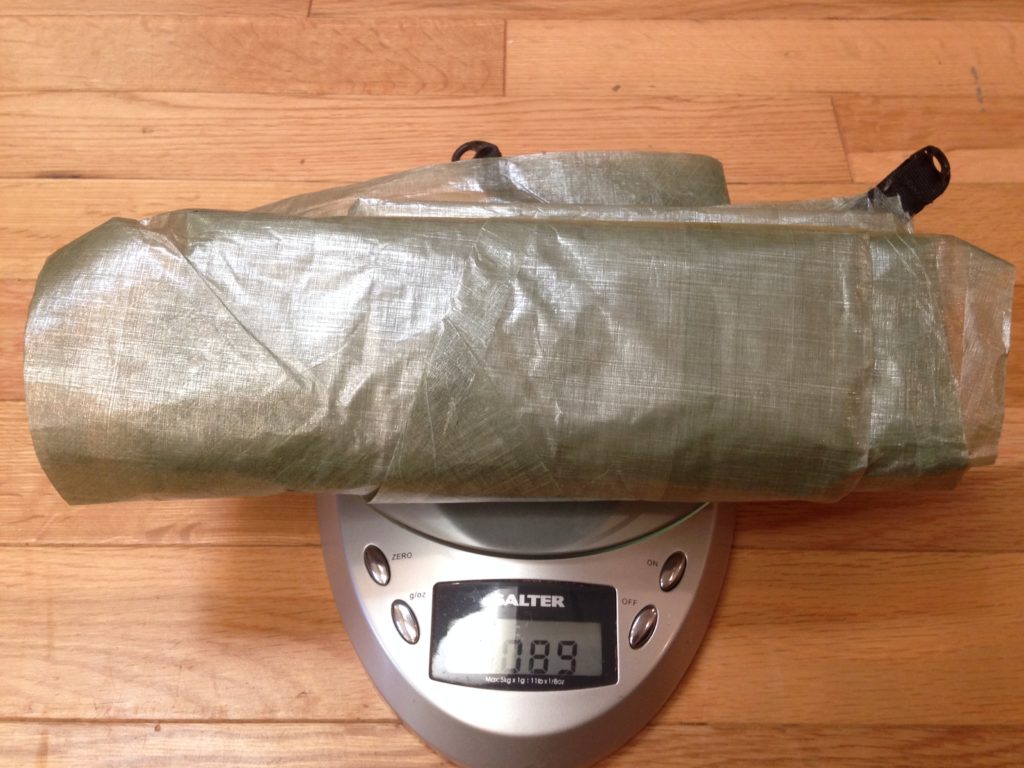
This DIY tutorial article covers complete steps for the construction of an 11-foot Cowboy D.A.R.T. — the Dyneema Advanced Recon Tarp — designed by kitsapcowboy AKA Christian Bynum of Bynum Graphic Design. It is a compact directional parallelogram asym tarp — ultralight weather protection for the hardcore hammock camper — that weighs about 3 ounces; it is constructed using Dyneema Composite Fabric (formerly known as Cuben Fiber).
Project Overview
| Skill Level | Estimated Time | Estimated Cost |
| Intermediate to Advanced | Approx 2 days | $$ |
Materials and Tools
| Materials Needed: | Tools Needed: |
| 3.5 to 4 Yards 0.51 oz Dyneema Composite Fabric* | Sewing Machine |
| 3 Feet 1/2″ Grosgrain Ribbon | Rotary Cutter or Sharp Blade (required) |
| 4 1/2″ Beastee Dee Rings | Cutting Mat (or other flat ablative surface) |
| Gear Aid Seam Grip Seam Sealer/Adhesive | Ruler, Protractor, and Marker (required) |
| 30 Feet 1/2″ 3M 9485PC Bonding Tape | Lighter |
| Guttermann Mara 70 Thread | Wax Paper (required) and Corrugated Cardboard (optional) |
* The Cowboy D.A.R.T. can be constructed from as little as 3.5 linear yards of DCF; however, purchasing 4 full yards will allow one to have DCF left over to make a matching stuff sack for this ultralight tarp, and it will also simplify marking and cutting of the reinforcement patches in proper alignment with the weave of the UHMWPE fibers, as well as provide extra material in case of errors occur cutting or applying the reinforcements. Extra DCF can be reserved for other small projects or near-seamless permanent repairs of the D.A.R.T. over its service lifetime.
Construction Steps
PHASE I — TARP PANEL

1) To build the Cowboy D.A.R.T., lay out your run of DCF and trim away both selvage edges with a rotary cutter or sharp knife exactly parallel to the weave, removing the transparent material right up to the first woven UHMWPE fibers, retaining as much width as possible (54″ to 55″).
2) Trim your full-width DCF panel (with edges removed) to 119″ long and reserve the spare rectangle of DCF fabric for future projects or repairs.
3) The D.A.R.T. has a cardinal lay direction over a gathered-end hammock (even though its lay direction can be reversed expediently in the field). If you are building the tarp for head left/feet right diagonal lay (typical), start at one end of your panel with the short edge in front of you; mark 13″ up the long edge on your left side, and cut diagonally from this mark to the corner at your right side (so that the cut edge created slants toward you from left to right). If you are building the tarp for head right/feet left diagonal lay (so-called “reverse lay”), start at one end of your panel with the short edge in front of you; mark 13″ up the long edge on your right side, and cut diagonally from this mark to the corner at your left side (so that the cut edge created slants away from you from left to right, as shown in the photo below).
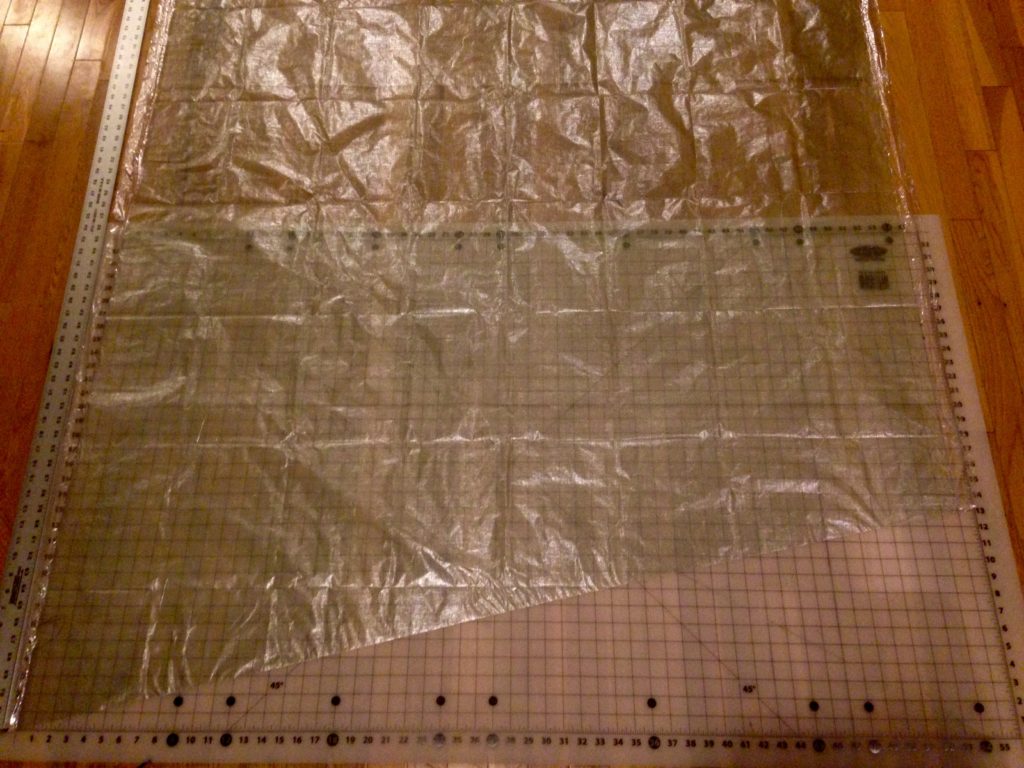
4) Make another diagonal cut exactly parallel to the one you just made at the other end of your tarp panel, forming a perfect parallelogram. NB: The side of the DCF facing up during this operation will become the top (outside) surface of the tarp (which you may wish to mark temporarily with a piece of masking tape). Reserve the two large DCF triangles you removed when making the cuts is in Steps 3 and 4, and set the tarp panel aside.
PHASE II — TARP TIE-OUT ASSEMBLIES
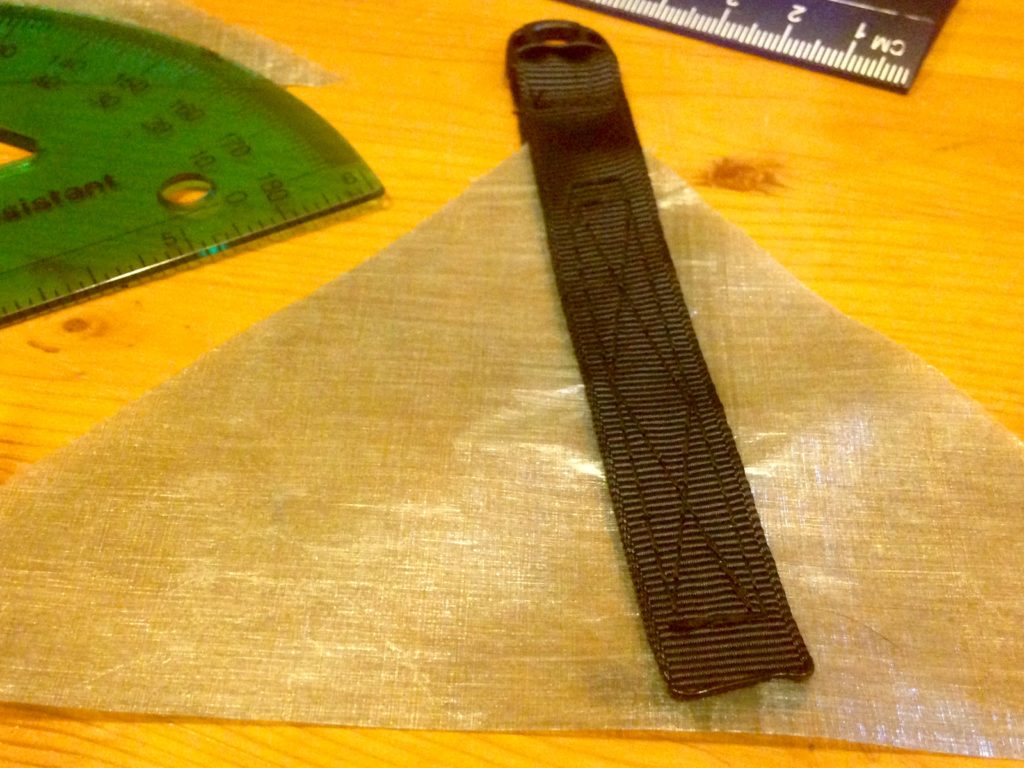
5) Cut four (4) 8″ lengths of 1/2″ polyester grosgrain ribbon, and seal all of the ends with a lighter to prevent fraying.
6) Mount a 1/2″ Beastee Dee ring at the midpoint of one length of 1/2″ grosgrain, fold the ribbon in half, and stitch the Beastee Dee into position on the ribbon with a light bar-tack immediately behind the hardware. The tails of the folded ribbon should be of equal length.
7) Repeat Step 6 for the remaining Beastee Dee rings and cut lengths of grosgrain ribbon from Step 5 to yield a total of four (4) tie-out assemblies; set these assemblies aside.
PHASE III — TARP PANEL RENIFORCEMENTS, PART 1 (LAMINATION)
8) Aligning the diagonals from point to point with the weave of the fabric, cut out six (6) rhombi (i.e., equilateral diamond shapes) with a 10″ height (long diagonal) and a 6.25″ width (short diagonal); set four (4) of the rhombi aside, leaving two (2).
9) Cut one rhombus in half along the long diagonal to form two (2) iscoseles triangles with a 10″ base, the obtuse (wide) triangle patches to be positioned at the side corners, and set them aside for Phase IV.
10) Cut one rhombus in half along the short diagonal to form two (2) iscoseles triangles with a 6.25″ base, the acute (narrow) triangle patches to be positioned on the tarp ridge line, and set them aside for Phase IV.

11) With the remaining four (4) rhombi you cut from the DCF material in Step 8, crisply fold two (2) of them along their long diagonals to form double-layer folded isosceles triangles with 10″ bases (obtuse/wide) and two (2) of them along their short diagonal to form double-layer folded isosceles triangles with 6.25″ bases (acute/narrow).
12) Striving for thin and even application of the adhesive with no trapped air bubbles between the two layers of material, apply Seam Grip to the interior surfaces of the four (4) folded double-layer DCF patches, crease them again, and smooth out any irregularities.

13) Place the two (2) acute (narrow) and two (2) obtuse (wide) bonded double-layer DCF triangle patches between layers of wax paper, and weigh them down with heavy objects on a flat surface.
WAIT 8 TO 24 HOURS FOR THE ADHESIVE TO CURE BEFORE CONTINUING
PHASE IV — TARP PANEL RENIFORCEMENTS, PART 2 (SEWING & BONDING)
14) Remove the cured and laminated double-layer triangle patches from the wax paper.
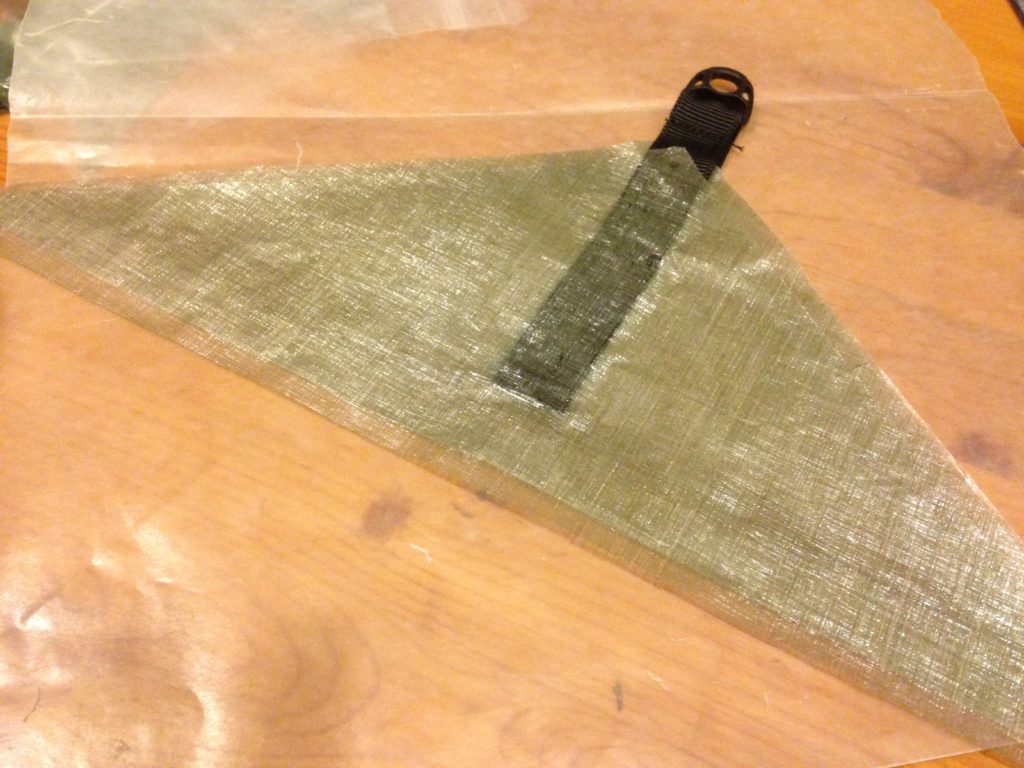
15) Using a protractor, position a grosgrain tie-out assembly completed in Phase II approximately 25 degrees off the centerline (which is aligned with the fabric weave) of each of the two (2) acute (narrow) double-layer DCF triangle patches completed in Phase III, so that the hardware of the tie-out assembly lies opposite the base of the triangle at the apex (i.e., the vertex (corner) between the two equilateral sides) with the tails of the grosgrain sandwiching the laminated double layers of the DCF patches; stitch the tie-out assemblies in position using a “box-X” stitch pattern and a moderate to long stitch length.
16) Position a grosgrain tie-out assembly completed in Phase II on the centerline (which is aligned with the fabric weave) of each of the two (2) obtuse (wide) double-layer triangle patches completed in Phase III, so that the hardware of the tie-out assembly lies opposite the base of the triangle at the apex (i.e., the vertex (corner) between the two equilateral sides) with the tails of the grosgrain sandwiching the laminated double layers of the DCF patches; stitch the tie-out assemblies in position using a “box-X” stitch pattern and a moderate to long stitch length.
17) Lay out the tarp panel on a clear, flat surface where it can remain undisturbed for about a day with the exterior (top) side down and the interior (bottom) side up (i.e., opposite the orientation in which it was cut in Phase I).
18) Spread a thin, even application of Seam Grip adhesive in each of the corners on the interior side of the tarp in an area congruent with the reinforcement patches and respecting an approximate 1/2″ allowance for the perimeter hem to be executed in Phase V, covering a triangular area approximately 5.5″ deep in each acute (narrow) corner and 3.75″ deep in each obtuse (wide) corner.
19) Position an acute (narrow) bonded double-layer reinforcement patch on each of the two adhesive-covered acute (narrow) corners of the tarp, so that the sewn grosgrain tie-out assemblies are in line with the long diagonal that will form the ridge line of the parallelogram-shaped tarp, set back 1/2″ from each raw edge as a perimeter allowance.

20) Position an obtuse (wide) bonded double-layer reinforcement patch on each of the two adhesive-covered obtuse (wide) corners of the tarp, positions for the lateral tie-outs of the tarp, set back 1/2″ from each raw edge as a perimeter allowance.
21) Spread a thin, even application of Seam Grip adhesive over each of the four (4) bonded double-layer reinforcement patches you glued down in Steps 19 and 20, working the adhesive into the grosgrain ribbon and along its edges, still respecting an approximate 1/2″ allowance for the perimeter hem to be executed in Phase V.
22) Extend the application of the Seam Grip adhesive an additional 1/4″ beyond each double-layer triangle patch along the length of its base on the interior (underside) of the tarp panel, and then cover the area with an congruent (matching) single-layer triangle patch, offset inboard past the base of the double-layer patch underneath it by 1/4″ so that it covers the additional adhesive you applied to the main tarp panel beyond the laminated patch. Minimize any trapped air bubbles or irregularities as you smooth down each of the four (4) corners as firmly as possible.

23) Sandwich all four (4) corners — each corner now comprising four (4) laminated layers of DCF material with the grosgrain tie-out assembly and all stitching encapsulated — between two layers of wax paper, and weigh them down with heavy objects in a stable fashion so that the can remain undisturbed during the curing process. (Layers of corrugated cardboard outside of the wax paper can help even out the pressure of your weights around the uneven tie-out assemblies while the corners dry.)
WAIT 8 TO 24 HOURS FOR THE ADHESIVE TO CURE BEFORE CONTINUING
PHASE V — FINAL ASSEMBLY
24) With a rotary cutter or sharp knife, trim off a small section of each corner of the main tarp panel perpendicular to the diagonal at that vertex to keep the tie-out assembly hardware exposed.
25) Crease the entire perimeter of the main tarp panel to form a single-fold hem 1/2″ wide, turned toward the interior (bottom) side of the tarp so that it overlaps the reinforcement patches at the four (4) corners.
26) Removing the dull, papery backing layer first, lay down 1/2″ double-sided bonding tape around the entire perimeter of the tarp, working in sections, if necessary, so that the tape is positioned between the raw edges of the tarp panel and the creases you formed in Step 25. Burnish the surface of the tape all the way around to ensure proper adhesion.
27) Again working in sections, if necessary, fold the perimeter hem over onto the main tarp panel and withdraw carefully the remaining shiny backing layer from the 1/2″ double-sided tape, smoothing out irregularities, eliminating air bubbles, re-creasing and burnishing the formed folded hem as you work your way around the perimeter of the tarp to obtain maximum adhesion.

28) Allow the tarp to cure for several hours after completing the perimeter hem with the bonding tape before use.
YOUR TARP IS NOW COMPLETE
Similar DIY Projects & Instructions
